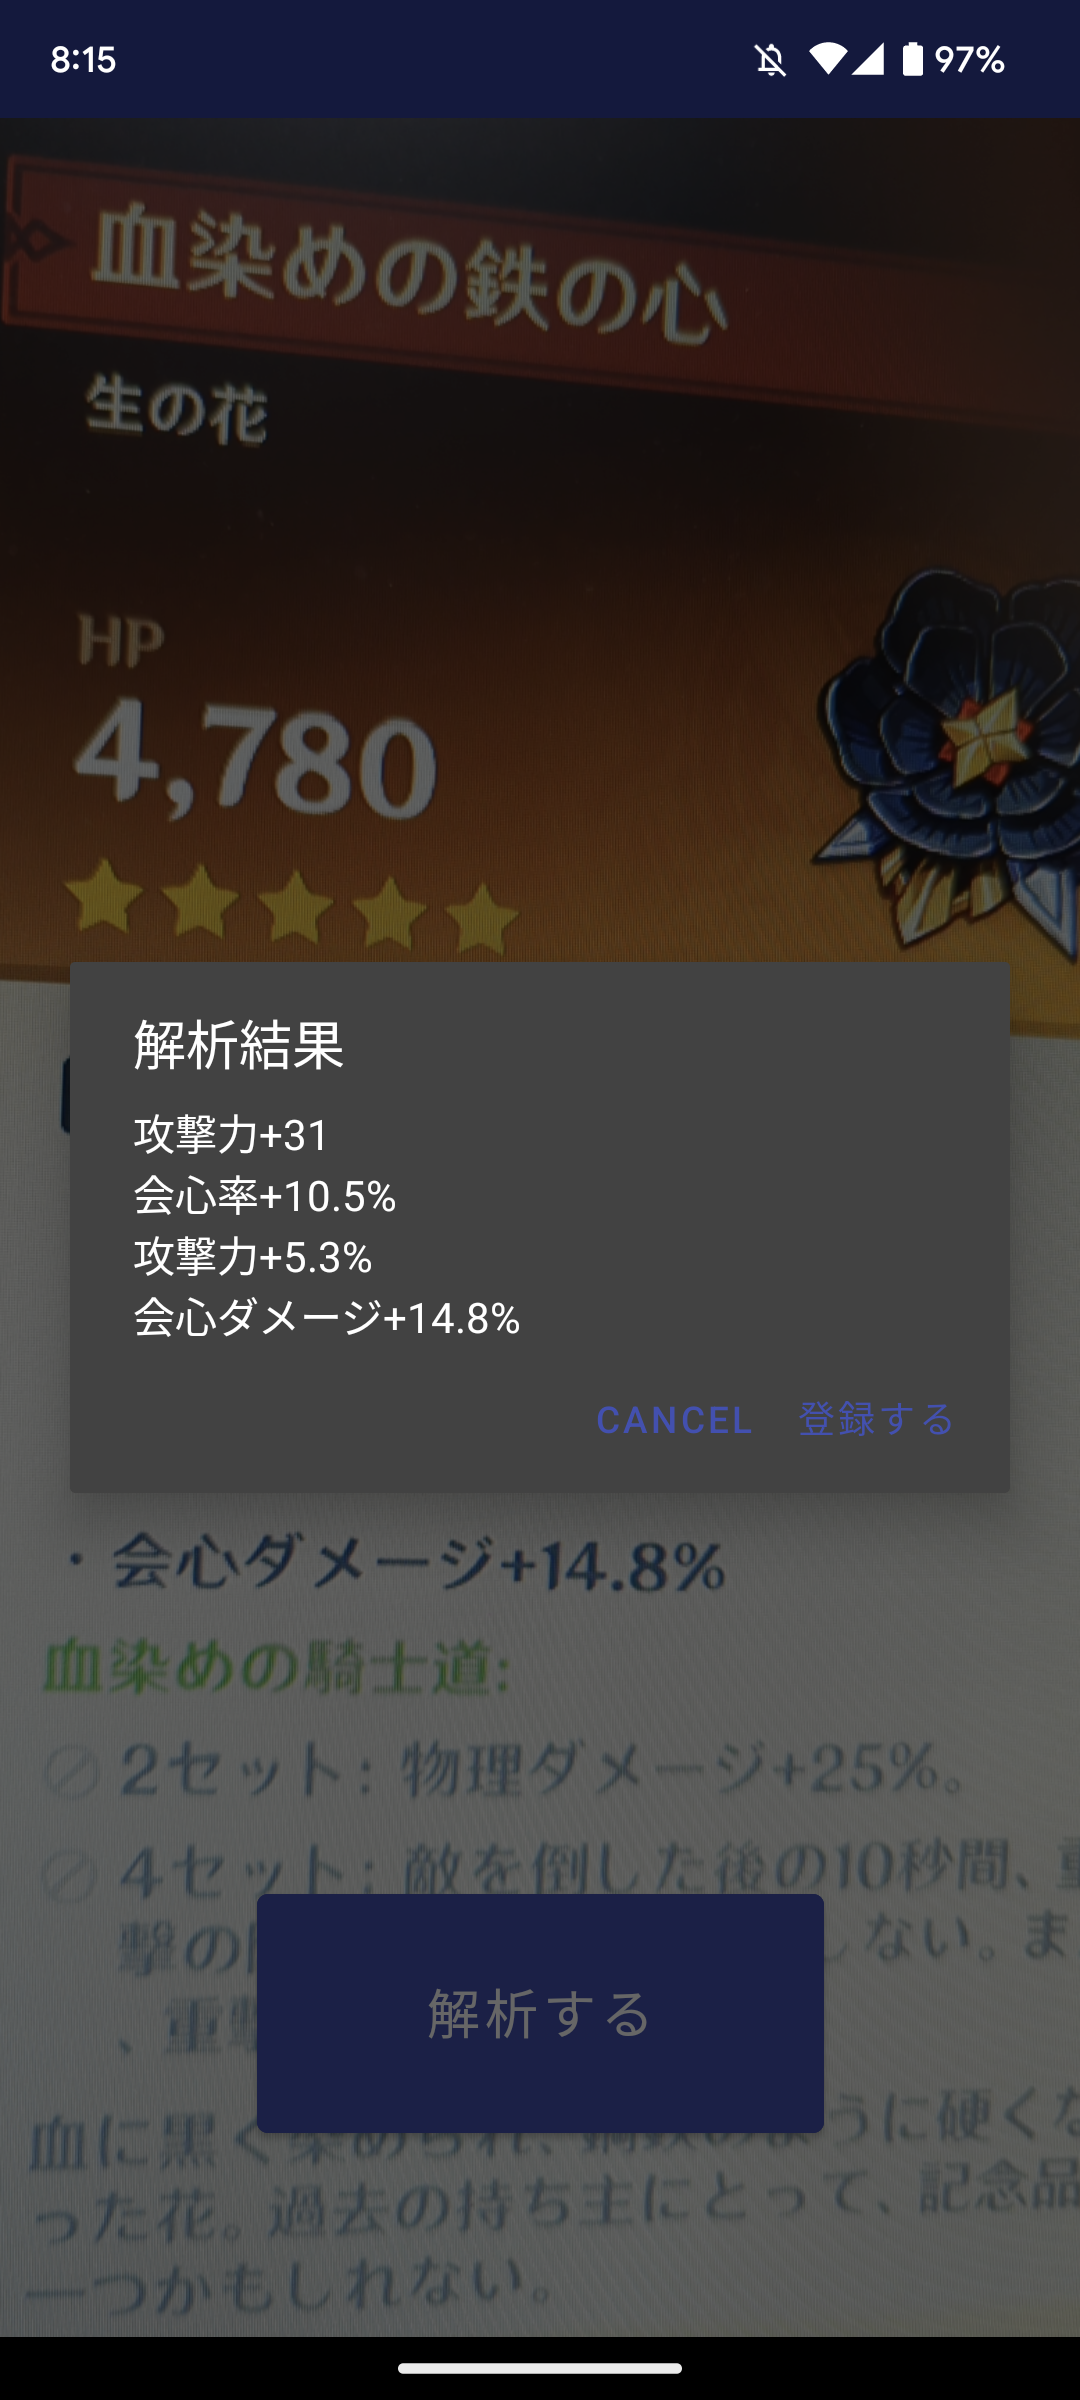
原神の聖遺物を画像解析して瞬時にスコア計算を行う
カメラで撮影したデータを文字認識させる
カメラを利用して文字認識を行うためには「カメラを使って写真を撮る処理」と「写真データから文字認識をする」の2ステップが必要になります。 またこの処理を直列的にそのまま処理することで、写真データをオンメモリで処理することができ、写真の保存をする必要がなくなります。 本記事ではAndroidでカメラを扱うための「CameraX」と、文字認識の実装を簡単に行える「MLKit」を用いた実装を解説していきます。
CameraXを扱ってカメラを使う
カメラを扱うには以下3つの観点を全て満たす必要があります
- 権限や設定を追加する
- プレビュー画面のレイアウトの決定
- 実際のプレビューの実装
それぞれ解説していきます
権限や設定を追加する
まずカメラを利用することになりますので以下をManifestに追加します
<uses-feature android:name="android.hardware.camera.any" />
<uses-permission android:name="android.permission.CAMERA" />
今回利用している依存関係は以下になります
const val core = "androidx.camera:camera-core:1.1.0"
const val camera2 = "androidx.camera:camera-camera2:1.1.0"
const val lifecycle =  "androidx.camera:camera-lifecycle:1.1.0"
const val view =  "androidx.camera:camera-view:1.1.0"
const val extension =  "androidx.camera:camera-extensions:1.1.0"
プレビュー画面のレイアウト決定
レイアウトの構成は下記になります
<?xml version="1.0" encoding="utf-8"?>
<androidx.constraintlayout.widget.ConstraintLayout
xmlns:android="http://schemas.android.com/apk/res/android"
xmlns:app="http://schemas.android.com/apk/res-auto"
android:layout_width="match_parent"
android:layout_height="match_parent">

    <androidx.camera.view.PreviewView
        android:id="@+id/camera"
        android:layout_height="match_parent"
        android:layout_width="match_parent" />

    <com.google.android.material.button.MaterialButton
        android:id="@+id/capture_button"
        android:layout_width="wrap_content"
        android:layout_height="wrap_content"
        android:layout_margin="72dp"
        android:paddingHorizontal="64dp"
        android:paddingVertical="32dp"
        android:backgroundTint="?attr/colorPrimary"
        android:text="解析する"
        android:textSize="20sp"
        android:textColor="@android:color/white"
        app:layout_constraintBottom_toBottomOf="parent"
        app:layout_constraintEnd_toEndOf="parent"
        app:layout_constraintStart_toStartOf="parent" />

</androidx.constraintlayout.widget.ConstraintLayout>
注意点としてCameraXで扱うPreviewViewはJetpackComposeでは表現できないため、AndroidViewを利用して回避するかxmlで構築する必要があります。
自分の場合は、この画面に関してだけxmlで記述しそれ以外の画面はJetpackComposeで記述していました
MaterialButtonの部分はなんでも大丈夫ですが、最終的に「撮影するためのボタン」が必要になります
プレビューの実装
実際にPreviewを行うためには下記のようなコードが必要になります。
override fun onViewCreated(view: View, savedInstanceState: Bundle?) {
    super.onViewCreated(view, savedInstanceState)
    val cameraProviderFuture = ProcessCameraProvider.getInstance(requireContext())
    cameraProviderFuture.addListener({
        val cameraProvider: ProcessCameraProvider = cameraProviderFuture.get()
        val preview = Preview.Builder()
            .build()
            .also {
                it.setSurfaceProvider(binding?.camera?.surfaceProvider)
            }
        imageCapture = ImageCapture.Builder().build()
        val cameraSelector = CameraSelector.DEFAULT_BACK_CAMERA //背面カメラで立ち上げる
        try {
            cameraProvider.unbindAll()
            cameraProvider.bindToLifecycle(
                this,
                cameraSelector,
                preview,
                imageCapture
            )
        } catch(exc: Exception) {
            Log.e("Camera", "Use case binding failed", exc)
        }

    }, ContextCompat.getMainExecutor(requireContext()))
}
CameraXとMLKitで文字認識させる
続いて文字認識についてですが、こちらはお手軽に使える「MLKit」を利用します
implementation("com.google.mlkit:text-recognition-japanese:16.0.0-beta5")
この後の処理も考えて成功時と失敗時でcallbackを外部から受けとって文字認識の処理を実装していきます
private fun textRecognition(
    onSuccess: (String) -> Unit,
    onFailure: (Exception) -> Unit,
) {
    val capture = imageCapture ?: return
    capture.takePicture(cameraExecutor, object : ImageCapture.OnImageCapturedCallback() {
        override fun onCaptureSuccess(imageProxy: ImageProxy) {
            val mediaImage = imageProxy.image ?: return
            val image = InputImage.fromMediaImage(mediaImage, imageProxy.imageInfo.rotationDegrees)
            val recognizer = TextRecognition.getClient(JapaneseTextRecognizerOptions.Builder().build())
            recognizer.process(image).apply {
                addOnSuccessListener {
                    val textString = it.textBlocks.joinToString("\n") { block ->
                        block.text
                    }
                    onSuccess(textString)
                }
                addOnFailureListener(onFailure)
            }
            imageProxy.close()
        }
    })
}
ImageProxyから画像データを取得し、その画像データをそのままMLKit側に投げることができます。分析した文字情報は、そのままの文字列にはならず一定の粒度でブロックとして構造的に扱われています。今回は取得した文字列から必要な情報を抽出する都合上、全て改行コードでjoinさせています。
最後にimageProxy.close()を実行していますが、こちらを実行していないとcloseされなくなってしまうので必ずcloseを実行しましょう。2,3回目以降の処理が正常に動かなくなります。
取得した情報から必要な情報を抽出する
最後に文字認識で画像から取得した文字列に対して、必要な情報を抽出します。
原神の聖遺物には以下のステータスがあるのでその情報のみを抽出します
- 会心率
- 会心ダメージ
- 攻撃力
- 防御力
- HP
- 元素チャージ効率
- 元素熟知
textRecognition(
    onSuccess = { text ->
        val replacedText = RecognitionModifier.fixRecognitionText(text)
        val regex = """
            (会心率|会心ダメージ|攻撃力|元素チャージ効率|元素熟知|防御力|HP)\+[0-9]+(\.[0-9])*%?$
        """.trimIndent().toRegex()
        val extractedData = replacedText.split("\n")
            .filter { regex.containsMatchIn(it) && !it.contains(":") }
            .mapNotNull { regex.find(it) }
            .map { it.value }
        val newText = extractedData.joinToString("\n")
        if (newText.isBlank()) {
            Toast.makeText(requireContext(), "解析に失敗しました", Toast.LENGTH_SHORT).show()
        } else {
            ResultDialogFragment(newText).show(parentFragmentManager, "result")
        }
        binding?.captureButton?.isEnabled = true
    },
    onFailure = {},
)
RecognitionModifier.fixRecognitionText(text)の処理は、文字認識で1-2文字誤認識が発生した際に文字列の修正を行うロジックになっています。
実際に動かしたところとしてはこのようになります
